| PFM | BFM |
BCM |
|
|
|
|
The Project Applications tab allows management of the 4-step application approval steps, stage steps of a Workflow and assessment indicators. Organisations can manage their 4-step application approval workflow by indicating the steps an application must go through and identifying the appropriate authorities for each step.Alerts for each approval step can also be activated and assigned to the relevant people within this section. Stages used within a Workflow must be included in a Project Template via the Application Stage smart component. Assessment Indicators are the criteria used to assess or score applications against and must be configured within User Defined Components and project templates.
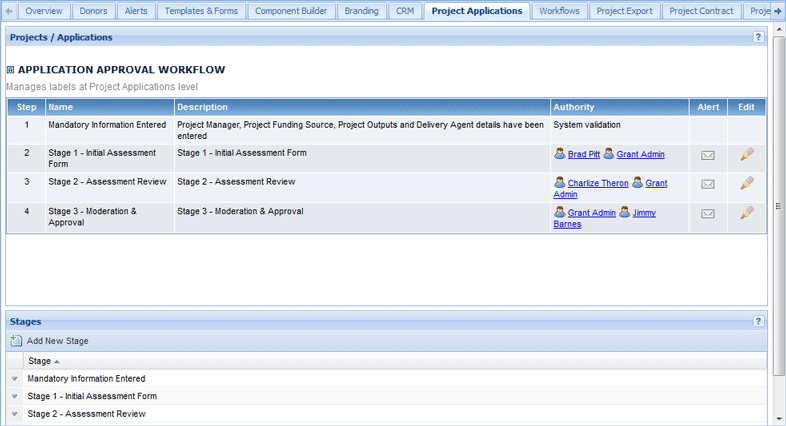
The 4-step Application Approval Workflow steps will have been setup within your Enquire implementation. Details of steps 2 – 4 can be edited to suit your organisation’s requirements.
An example of a 4 step application approval workflow may be:
1. Select My Group from the Home drop down menu.
2. Select the Projects Applications tab.
3. Select the edit icon to edit the relevant step’s details.

4. You can edit now the step’s description, and add or remove step authorities. If you would like the edit the step’s name, please edit the stage that corresponds to the step.
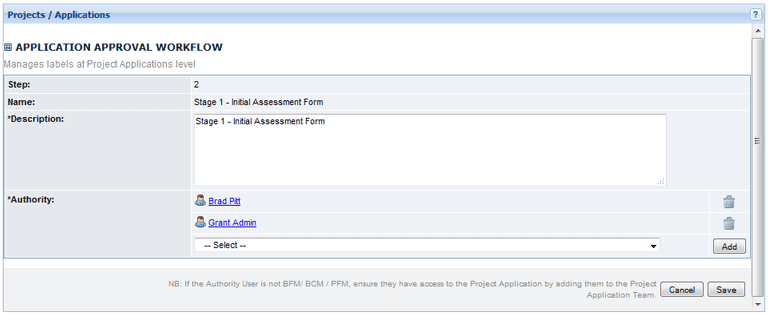
5. Select Save to save your changes to the application approval step.
1. Select My Group from the Home drop down menu.
2. Select the Projects Applications tab.
3. Select the pencil icon to edit the relevant step’s details.

4. Select the relevant name from the drop down menu and then select the Add button.
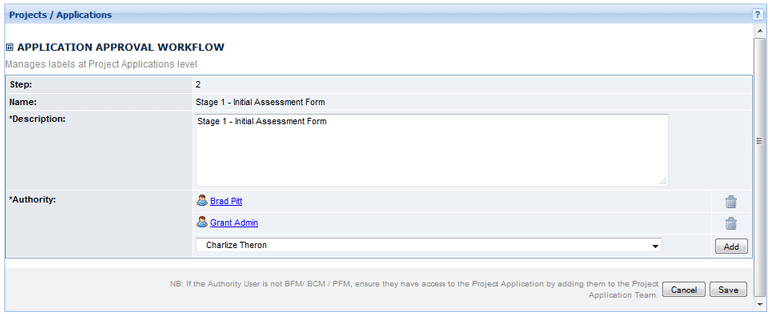
A new authority will now be added. This person will be able to review and update the application to the next step.
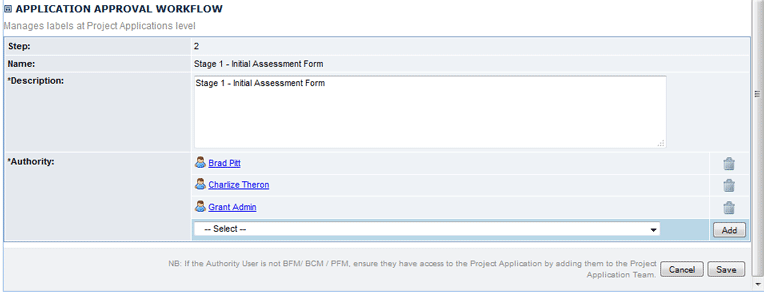
5. Select Save to save your changes to the application approval step.

1. Select My Group from the Home drop down menu.
2. Select the Projects Applications tab.
3. Select the edit icon to edit the relevant approval step’s details.

4. Select the remove icon next to the relevant authority.
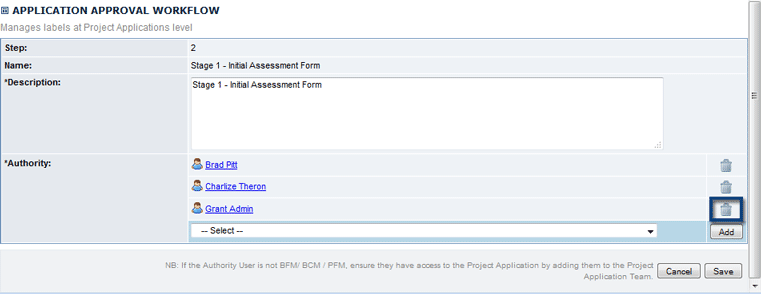
5. Select OK to confirm the removal.

The authority will now be deleted from the approval step.

6. Select Save to save your changes to the application approval step.

Alerts can be set up for each step of the approval process and organisations can edit and activate where required. These alerts can be sent automatically to particular roles identified within an Application as steps are signed off.

The envelope icon next to a step indicates the alert’s status:
| Icon | Description |
|
|
No alert has been set up |
|
|
The alert is active |
|
|
The alert is inactive |
1. Select My Group from the Home drop down menu.
2. Select the Projects Applications tab.
3. Select the envelope alert icon next to the step you wish to create an automated alert for.

4. Enter the message to be sent. Use the drop down menus to insert data fields. When the alert is sent, these fields will populate with the relevant information from Enquire.
5. Select the checkbox next to the relevant role who will receive the alert.
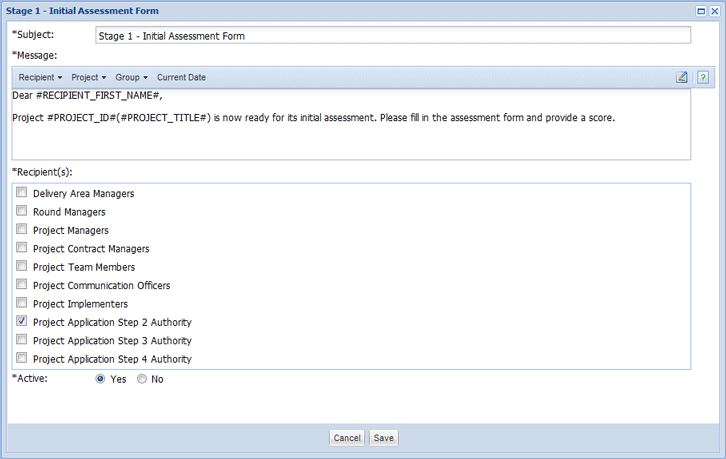
6. In the Active section, select Yes to activate the alert or select No to keep the alert inactive. Alerts are by default set to be Active when created.

6. Select Save to save your changes.
The alert has now been created and activated.

Stages are used in the 4-step application approval and assessment workflows to indicate the stage an application has reached. For example an application could go from an Initial Assessment stage to a Financial Review stage. Application Stages must be included in the relevant Project Template to be made available within a Workflow. See the Add Stages to Workflows section for more information.
1. Select My Group from the Home drop down menu.
2. Select the Project Applications tab and scroll down to the Stage section.
3. Select the Add New Stage button.

4. Enter the stage’s name and select Save to create the stage.

The application stage will now be added and can be added to the Application Stage smart component and then selected at a Workflow’s Stage step.

1. Select My Group from the Home drop down menu.
2. Select the Project Applications tab and scroll down to the Stages section.
3. Select the down arrow next to the relevant stage and select Edit from the menu.

4. Edit the stage’s name as required and select Save to save your changes.

The application stage has now been edited.

Once Stages have been created, these can be added to a Project Template via the Application Stage smart component and made available within Workflows for use in Stage steps.
1. Create or edit the relevant Project Template.
2. Add the Application Stage smart component to the template.
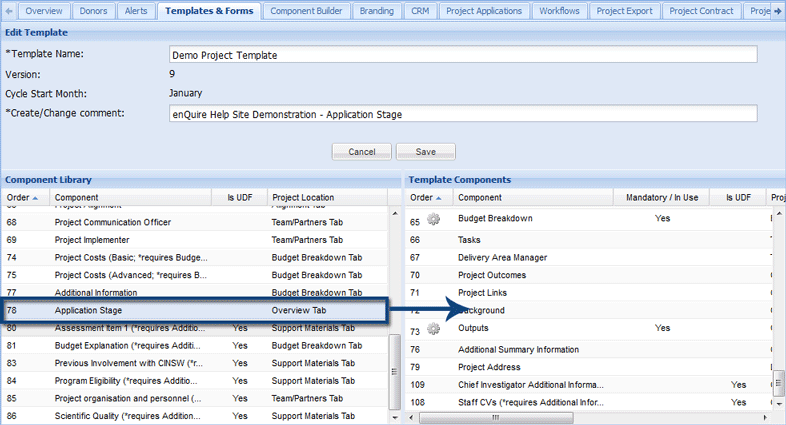
3. Select the stages that you would like to be available within the workflows linked to the template. You may also select the Bulk Actions you would like available to the selected stages. Stages can also be made Editable in the Applicant Portal which allows any application at the selected stage to be amended by an Applicant Portal user.
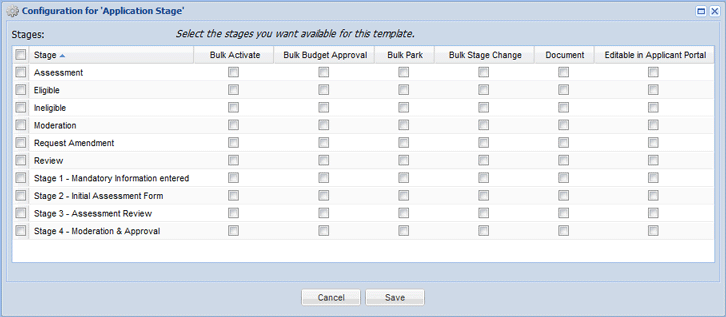
In this example, the Bulk Park action is available on all stages but the other Bulk Actions are only available at certain stages.The Request Amendment stage has been configured to allow external applicants to amend their applications once this stage has been reached.
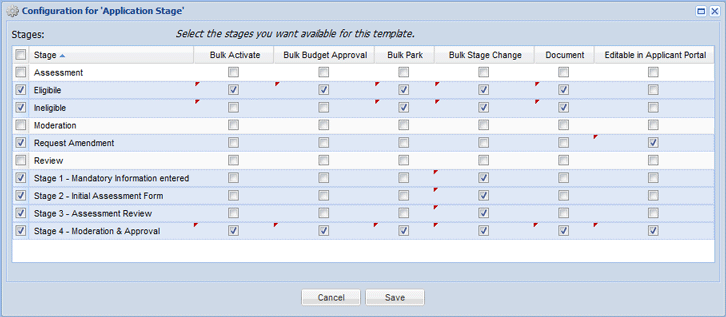
4. Select Save to save your choices and then save the project template.
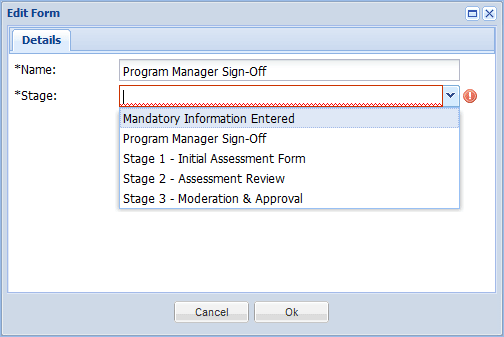
5. The selected stages will be now be available to select from when creating or editing stage steps within a Workflow.
Assessment Indicators are the criteria applications are assessed or scored against which determines their success. For example, your organisation may assess applications using the following indicators:
An applicant can score positively against the Eligibility indicator by answering key questions. Answers from an applicant and subsequent assessment results can be aggregated towards an indicator which is used to determine the assessment outcome. Scoring is configured through project templates and User Defined Components.
1. Select My Group from the Home drop down menu.
2. Select the Project Applications tab and scroll down to the Assessment Indicators section.
3. Select the Add New Indicator button.

4. Enter the indicator’s name and then select Save.

The assessment indicator has now been created.

1. Select My Group from the Home drop down menu.
2. Select the Project Applications tab and scroll down to the Assessment Indicators section.
3. Select the down arrow next to the relevant indicator and select Edit from the menu.

4. Edit the indicator as required and select Save.

The indicator will now be updated with your changes.

1. Select My Group from the Home drop down menu.
2. Select the Project Applications tab and scroll down to the Assessment Indicators section.
3. Select the down arrow next to the relevant indicator and select Delete from the menu.

4. Select Yes when prompted.

5. The indicator will now be deleted.

Scoring ranges for Assessment Indicators can be configured for each project template using the Assessment Indicators smart component. This can be used to determine how an application rates against your assessment criteria through User Defined Fields and Components. For example, Eligibility has a total score of 100 and the scoring ranges are configured as Ineligible (0 – 50) or Eligible (51 – 100). When an applicant or an assessor fills in a form, their responses collected by the UDCS will a score against the assessment indicator and determines if an application is successful.
1. Create or edit the relevant project template.
2. Add the Assessment Indicator and Additional Information components to the template.
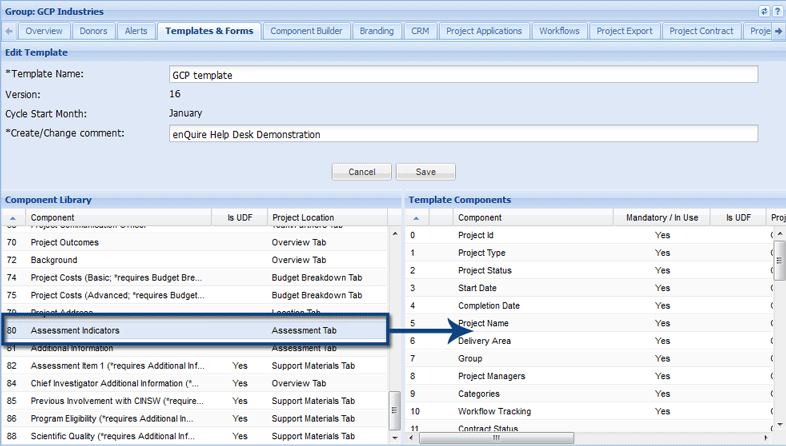
3. Select the indicators you wish to include and configure. In this example we want to define the scoring ranges for the Eligibility indicator.
4. Select the Add button to create a scoring range. You can then edit the From and To ranges, and the score rating (Value).
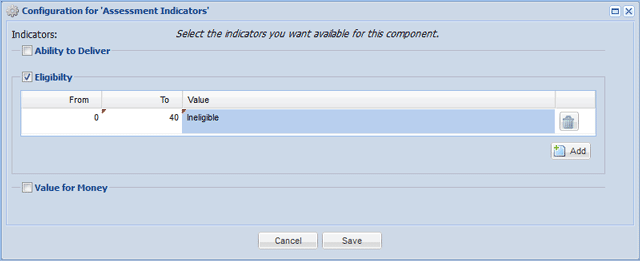
5. Continue to add and edit scoring ranges.
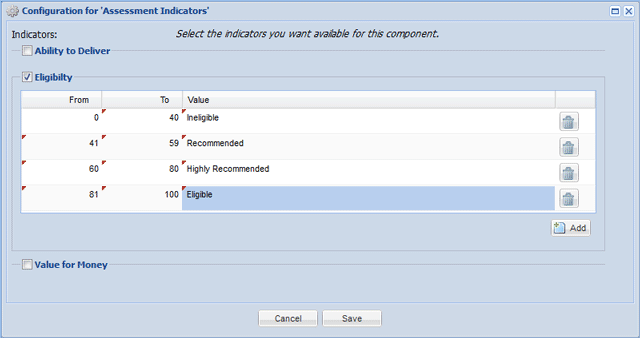
6. Select the bin icon to delete any scoring ranges.
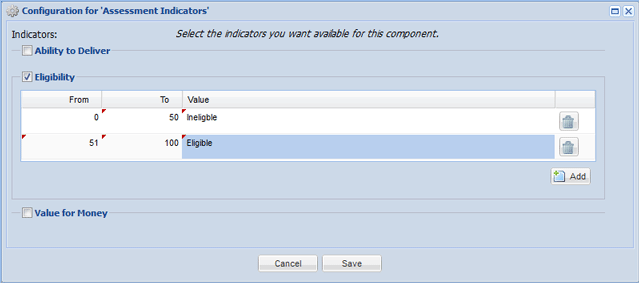
7. Select Save to save your scoring ranges and then Save the project template.